COB small pitch LED display screens are being applied to various high-end indoor scenes due to their excellent display effects and technological advantages. However, the installation of COB LED display screens cannot be neglected at all. Any operational error may result in damage to the screen or accessories, causing significant economic losses. In order to present a perfect display effect, the installation precautions are as follows:
I. Preliminary preparations-COB small pitch LED display
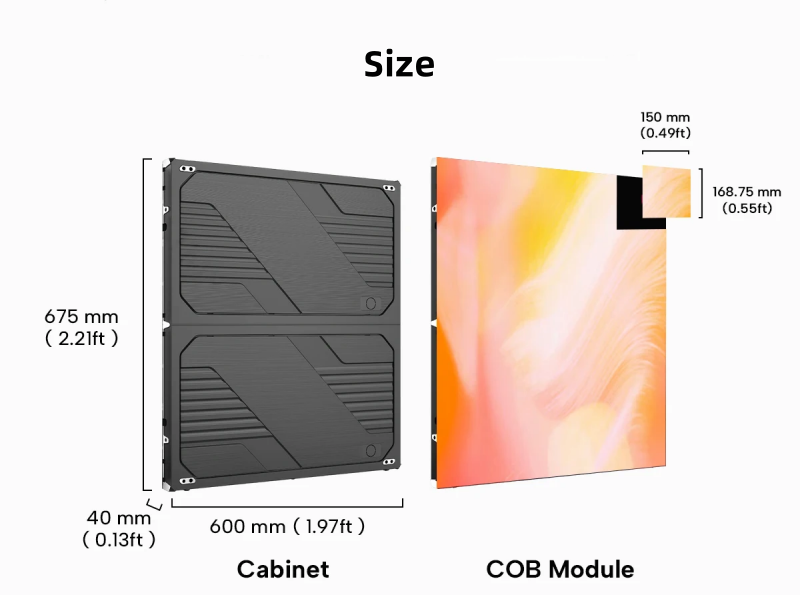
Before installing the COB LED display screen, the installer needs to carefully study the information provided by the manufacturer. The manufacturer conducts strict calibration, installation, and 48 hour aging testing before leaving the factory. And each batch of goods from the manufacturer has a dedicated product number. The splicing of modules and boxes follows strict procedures. Otherwise, random installation may cause gaps in the display between the module and the box, which can easily lead to color block problems such as red or blue bias or uneven brightness. Finally, inspect the cabinet for deformation and ensure the lock buckle is intact before installation.
II. Overall installation process control
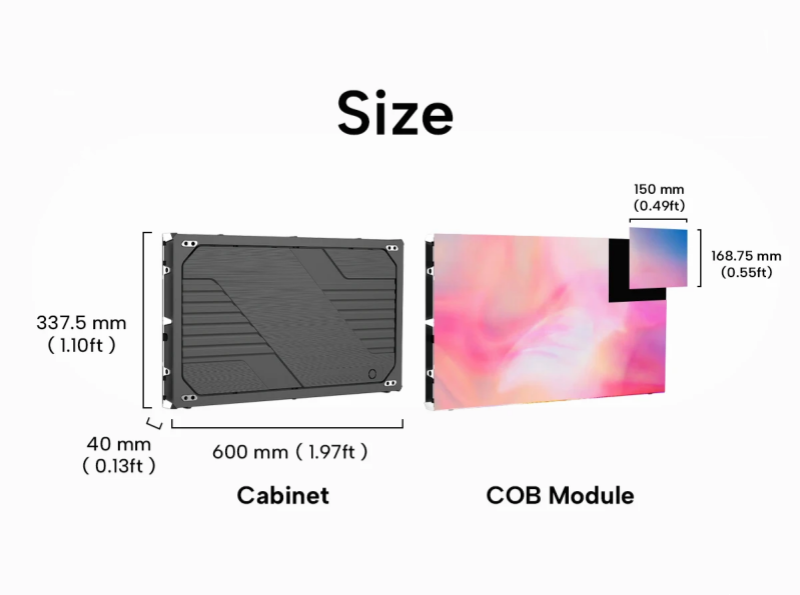
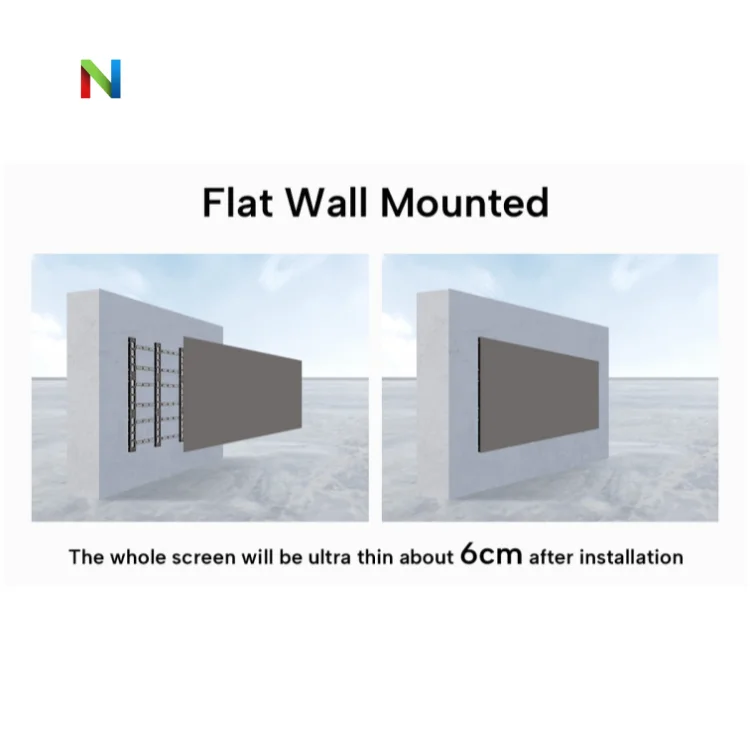
COB small pitch LED displays are mostly made of die cast aluminum material, which is lightweight and has high flatness. Therefore, during installation, follow the process of making the wall structure → installing boxes one by one → internal wiring → pasting modules → edging. At the same time, when making structures, the walls/steel structures must be firm and reserved for maintenance space. The purpose of doing this is to avoid slight dimensional errors and to correct gaps during edge wrapping, ensuring uniformity around the edges. Thus achieving uniform and controllable overall screen.
III. Cabinet installation-COB small pitch LED display
After accurately adjusting the horizontal and vertical angles, install the connecting pieces in sequence. Secondly, strictly control the flatness of the box. If it is not flat, it will directly affect the display quality of the COB LED display screen after the subsequent module splicing. Furthermore, strictly assemble from bottom to top. When assembling the box, first install the axis screws, but do not tighten them. Finally, strictly control the cabinet splicing gaps to prevent modules from failing to install caused by overly tight cabinet fitting.
IV. Precautions for module installation
Place the modules flat; do not stack or bump them. Install the modules strictly according to their numbered sequence and do not mix them up. During installation, use “installing while measuring” to check for display issues such as brightness, color uniformity, and bad pixels. Promptly identify and troubleshoot problems to avoid rework on major projects.
V. Wiring specifications-COB small pitch LED display
Arrange the wires (including power cables, network cables, and data cables) in a reasonable direction to avoid tangling and prevent interface loosening or damage caused by pulling. It is also beneficial for later maintenance. Secondly, follow the principle of “connect weak current first → verify correctness → connect strong current later”, and strictly prohibit plugging or unplugging modules, cables, power supplies and receiving cards while live.
Power wiring: Strictly distinguish the positive and negative poles, and do not reverse the connections. Reverse connection must burn the module. Secondly, tighten the power output line to prevent false connections from heating up and causing fires. Finally, multiple power sources must provide equal current supply to avoid excessive load on one circuit.
VI. Summary-COB small pitch LED display
Observe all installation precautions for COB small-pitch LED displays strictly to prevent potential issues during installation. At the same time, ensuring the perfect installation of the screen, fully utilizing its excellent display performance, and bringing a perfect visual experience.